Drawing a Simple Object, the Onion: From Block-In to Final Touches
The Importance of a Solid Start: Building the Foundation for a Well-Finished Drawing
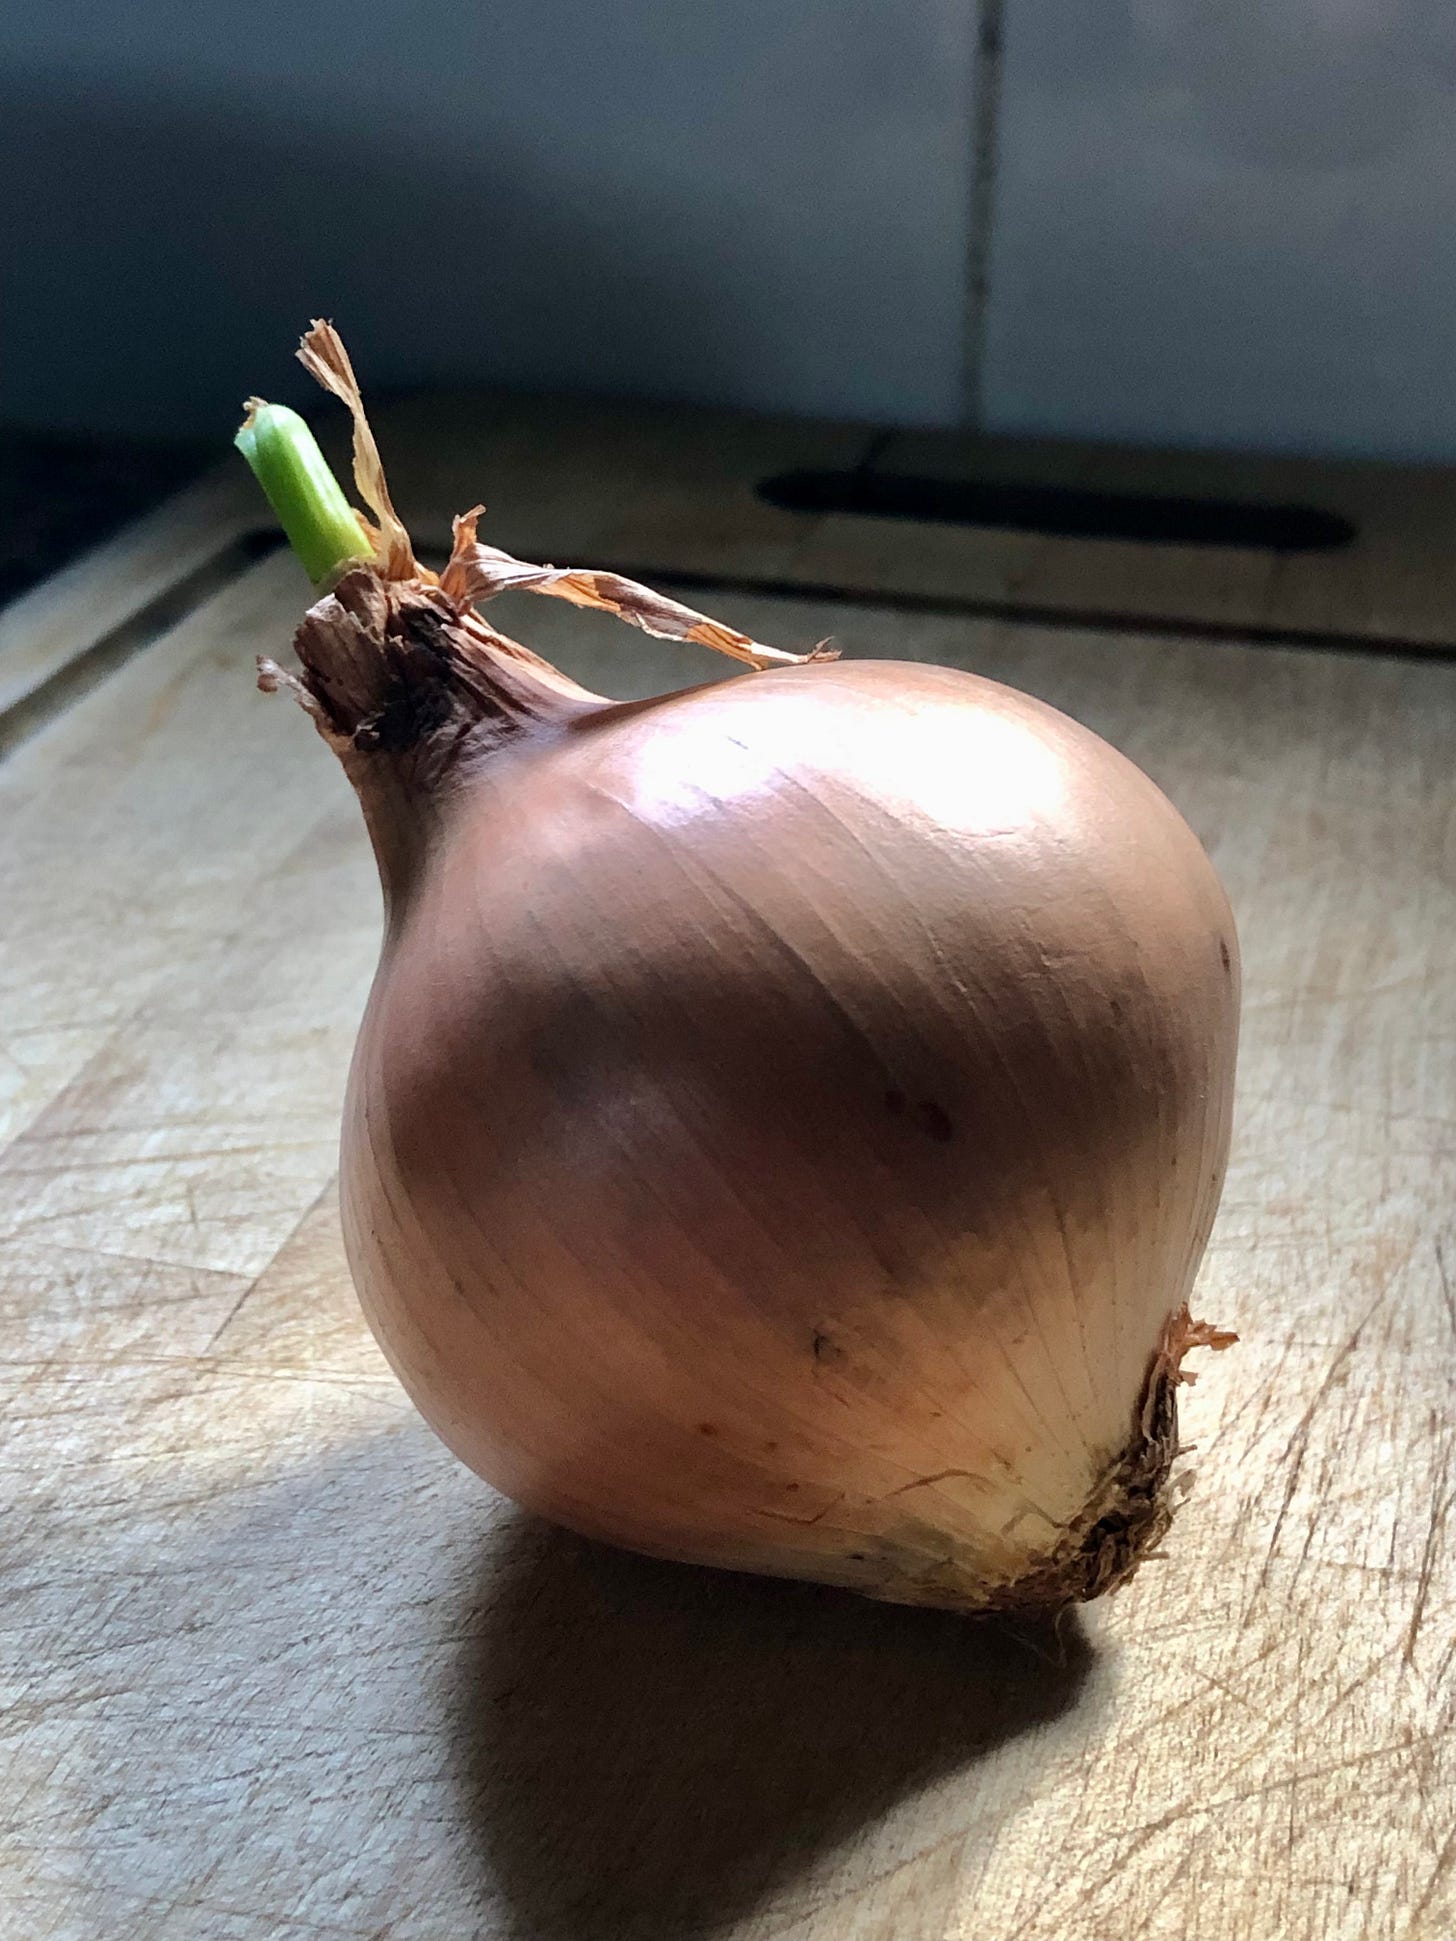
Let's start with a simple object: an onion. At this stage, our concerns about composition will be minimal, focusing only on ensuring there is enough space for the drawing on the paper. Avoid drawing too large or too small; ideally, the drawing should take up a bit more than the size of a closed fist.
We chose to start with an object like this to encourage students to concentrate on correctly observing proportions, understanding three-dimensional form, and distinguishing light from dark. For this reason, the first three steps are the most important in this demonstration. Everything that follows will require only a bit of patience and practice. The foundation of the entire drawing lies in these early stages. Try not to rush and aim to do the best work possible in this initial phase.
Don’t get discouraged if the drawing doesn’t turn out exactly as expected. You’ll find that drawing can be challenging at first, but with practice and patience, and by focusing on these initial stages with similar objects, you’ll soon see progress and find the process easier.
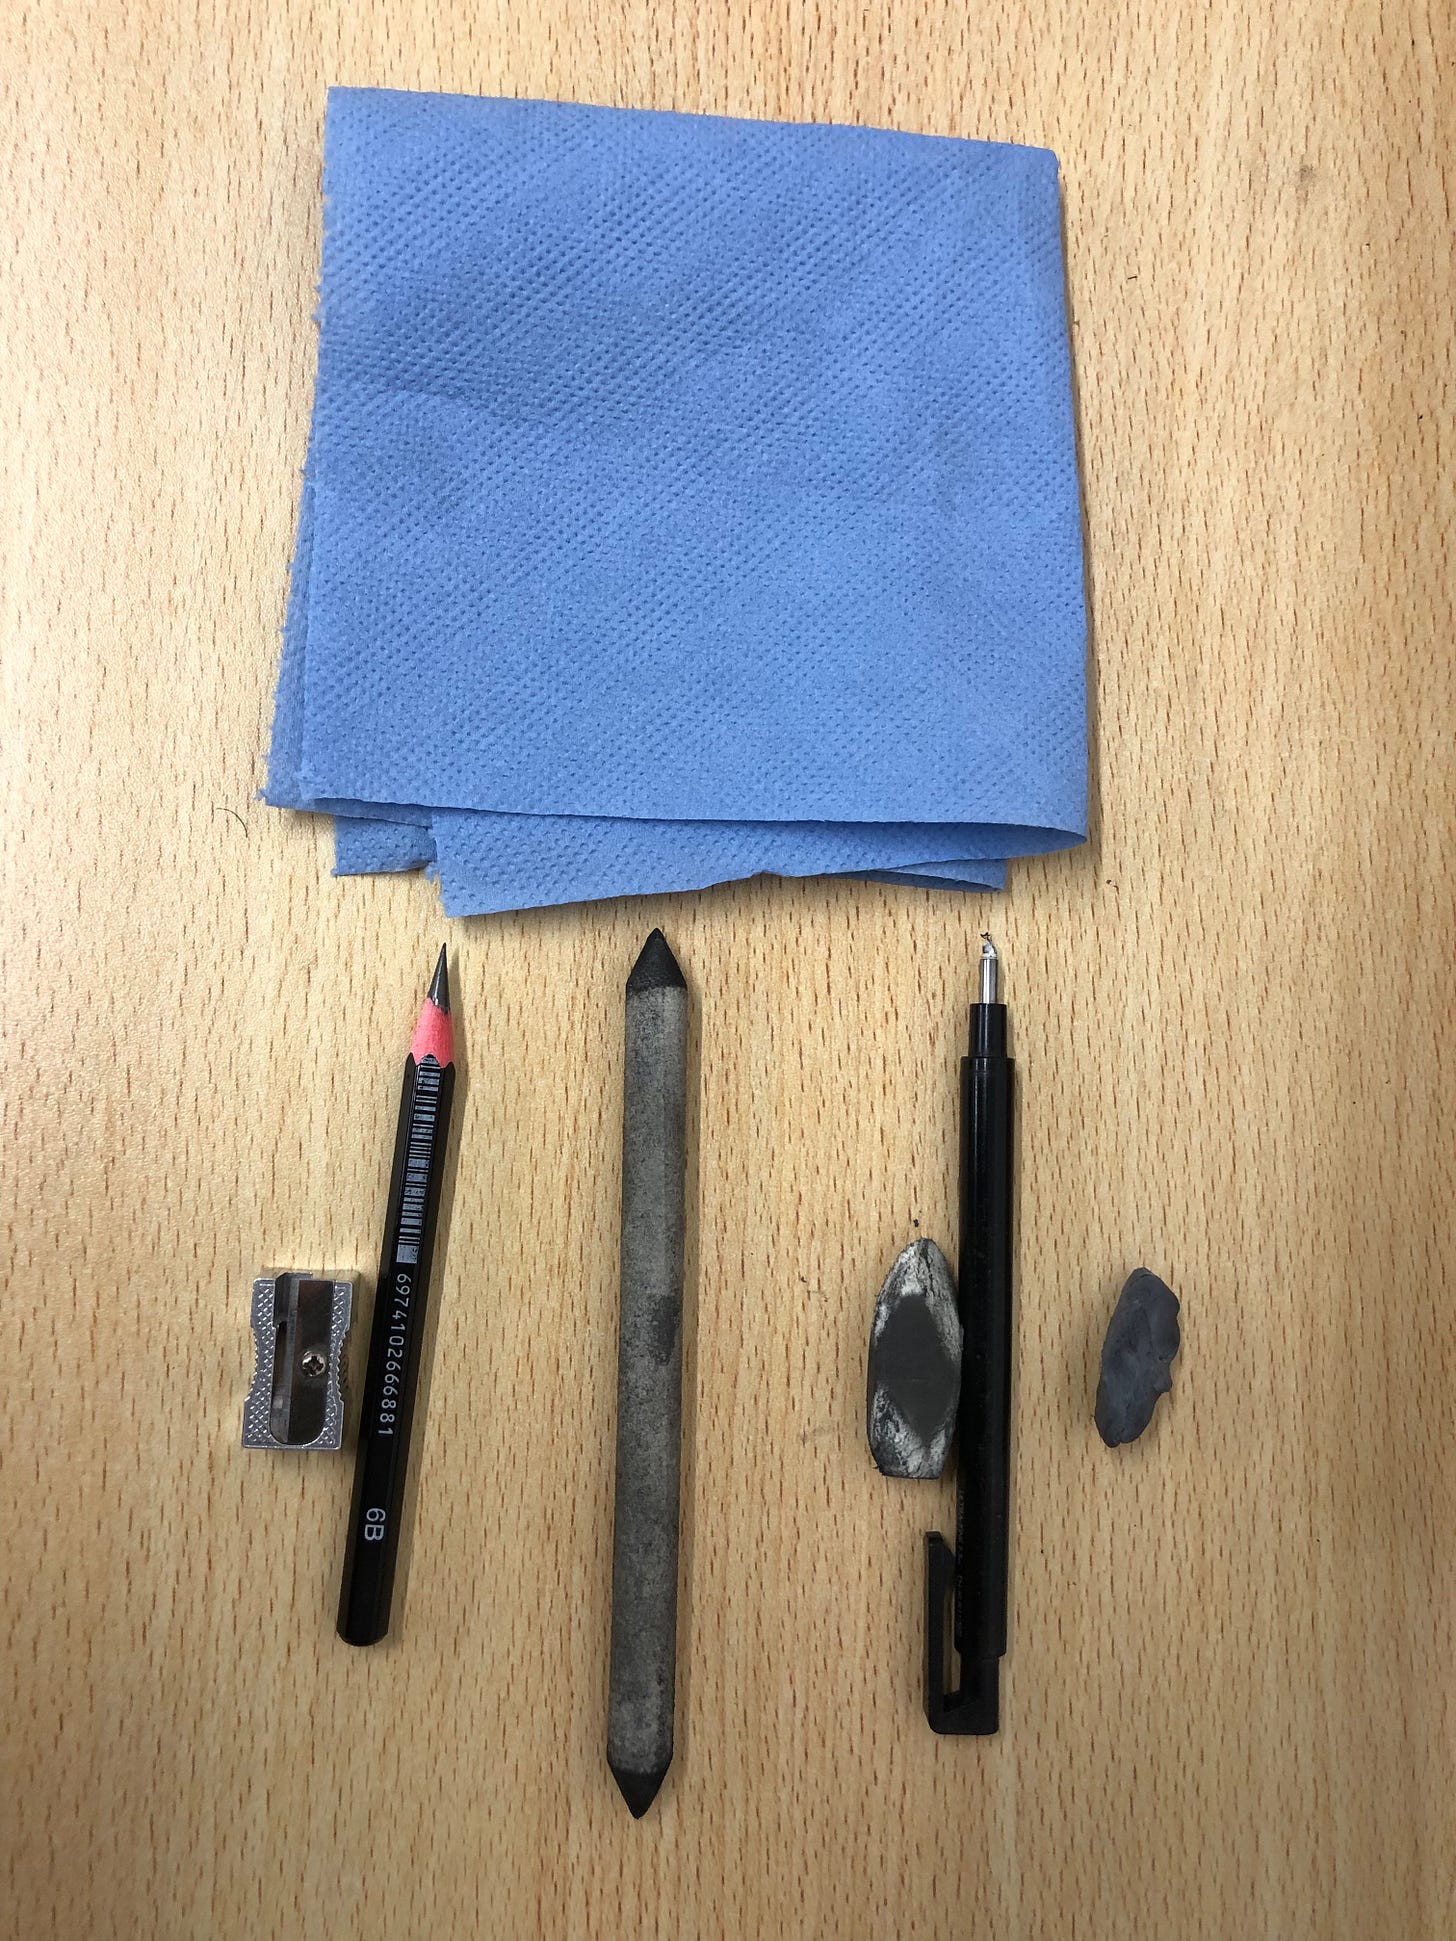
Our materials will be very simple: a 6B pencil, a sharpener, a blending stump, a paper towel, an eraser, and a sheet of drawing paper.
I’m using a very smooth paper, which causes my soft pencil to smudge easily — I intend to use this effect to my advantage. Other types of paper may produce slightly different results. Always experiment with different paper textures and, over time, find the material that works best for you.
First Stage: Envelope and Block-In
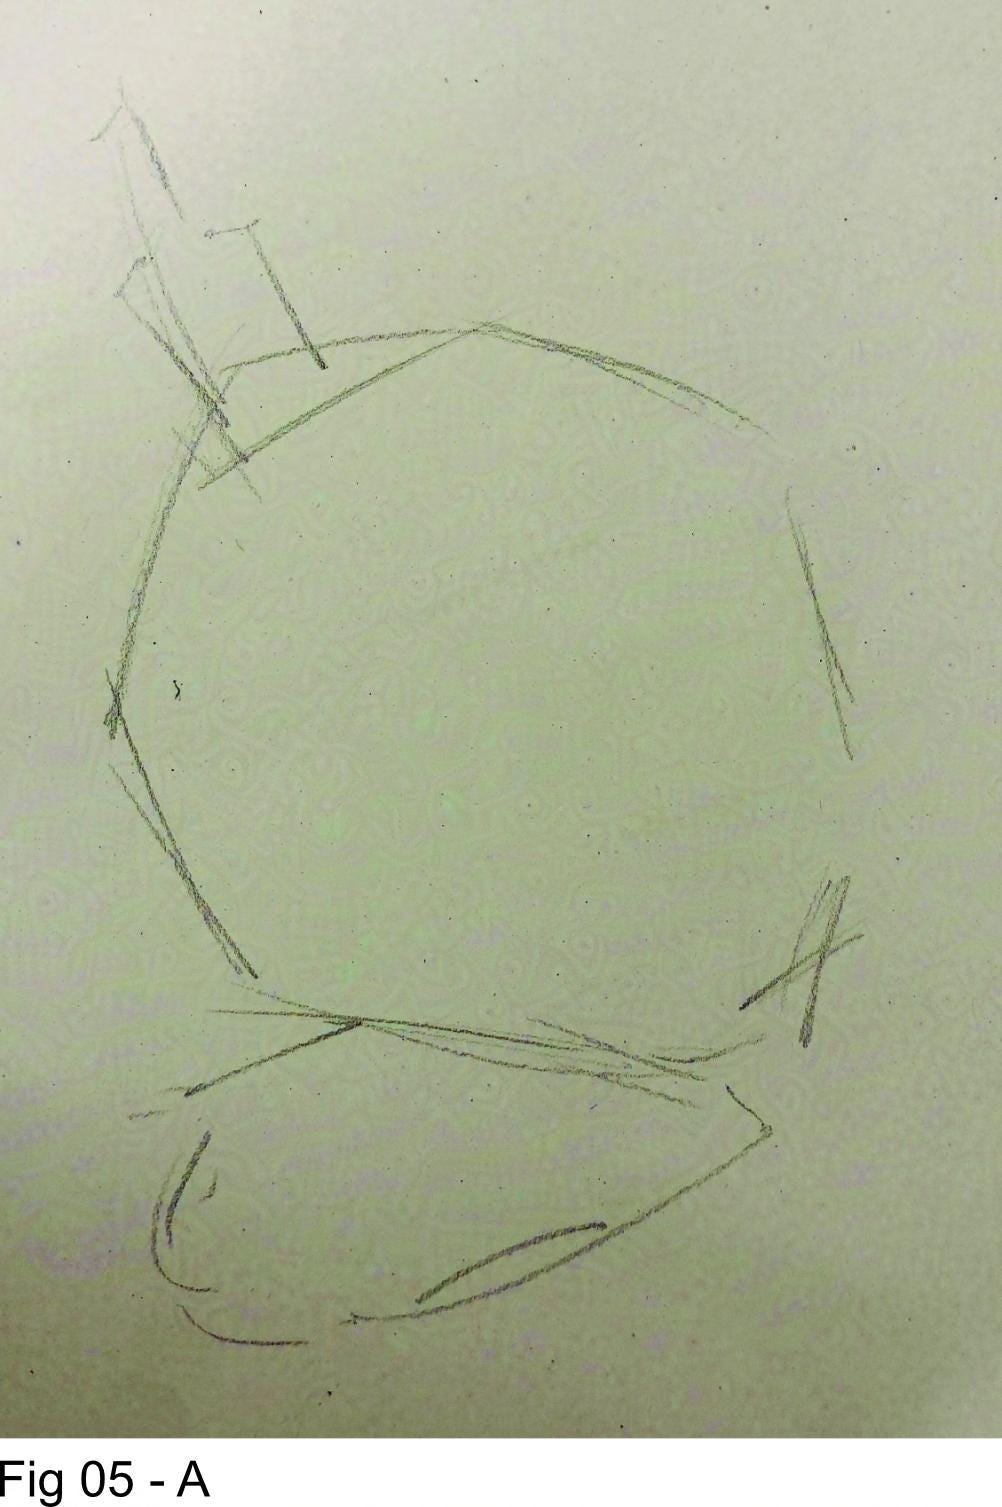
Take a close look at Fig05-A. These are my initial strokes. Don’t rush this stage, as this is where you’ll train your eye. Watching more experienced artists go through this process, it may seem irrelevant since it lasts only a few seconds — this is because they already have a trained eye.
Trust me: you want to take your time here. Measure accurately, even more than once if needed. Compare proportions and angles, make corrections, and adjust until you feel the drawing is well-prepared for the next phase, where changes and corrections will be minor.
This is where the battle is won.
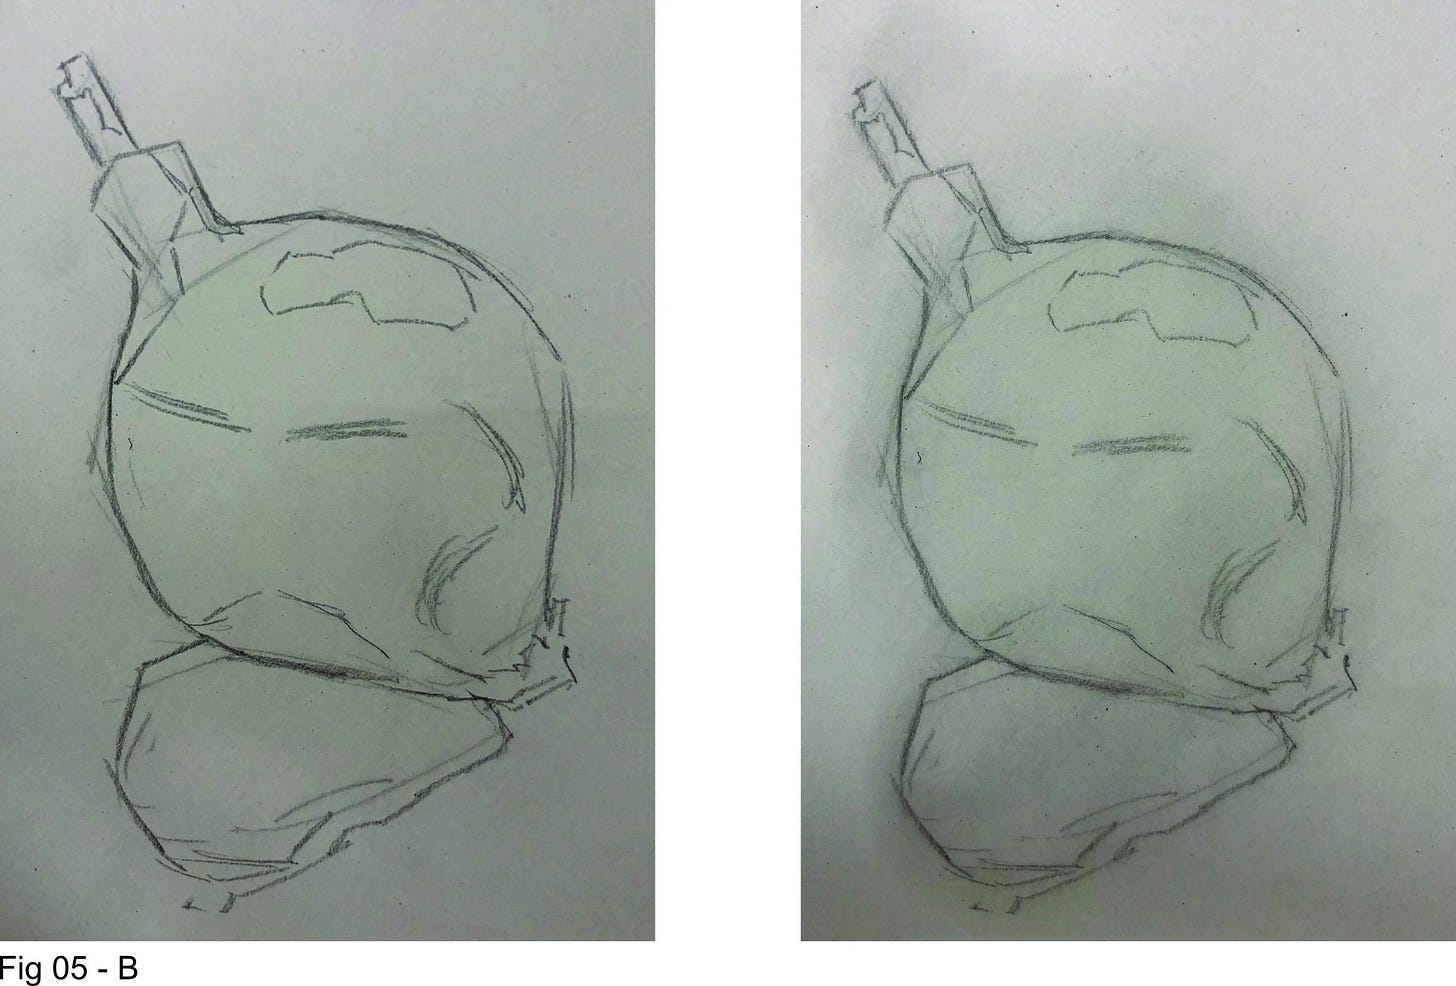
In Figure 05-B, on the left, you can see how the initial strokes are developed. An image begins to take shape, and now we have something that starts to resemble an onion. However, the most important point is to notice how much of the initial strokes have been maintained in this stage. Everything that seemed accurate was preserved, while any adjustments needed were made right away.
On the right, we see the same drawing, but now with a slight smudge, created by passing a paper towel over the drawing. This softens the lines made with the 6B pencil, making them a bit more subtle for the next stage. At this point, the effect of the smudge may seem minimal, but I believe that, throughout the process, you’ll see how this technique contributes to the final result.
End of the First Stage: The Block-In
Observe Figure 05-C. Over the smudged drawing, I make further corrections. I haven’t used an eraser so far. The lines I find less precise become softer with the smudge, while those that seem accurate are reinforced with a firmer stroke.
In Figure 05-B, we worked with large shapes indicating the general proportions of the object and the areas of light, shadow, and highlights. Now, I start drawing some secondary shapes; what was once defined by a single line is now divided into three to five smaller lines. I also take this opportunity to suggest the onion’s texture, adding structural lines that reinforce the spherical three-dimensionality of the object.
Notan: Separating Light and Shadow Families
Building on the block-in, I proceed to Figure 05-D, filling in the shadow areas with a continuous tone using the side of the pencil. At this point, the drawing should already have a close approximation of the final result, with a clear read of the image, even when viewed from a distance.
In Figure 05-E, I pass the paper towel over the drawing again, maintaining the separation between light and shadow but bringing a slight gray tone to the light areas. Now it’s time to use the eraser for the first time, not as a correction tool, but as a painting tool—a “brush” with which I will paint and sculpt the light shapes.
In the detail of Figure 05-F, we can see how the graphite spread throughout the drawing so far allows the marks from the eraser to emerge. In Figure 05-G, we have the complete separation of shadow areas, mid-tones, and highlights. From here, it's simply a matter of respecting these divisions and creating subtle variations within each of them.
Final Touches: Rendering Light, Shadow, Textures, and Adding Details
In Figure 05-H, we see the final result of this sketch. The entire process took just over 30 minutes, but it’s essential that you don’t rush and focus on doing a good job at each stage.
Try finishing a drawing by going through all these stages. However, for every object you take to the stage of Figure 05-H, make at least ten sketches up to the stages of Figures 05-C or 05-D. The most important thing is to train yourself to start your drawings well; you’ll have plenty of time to learn how to finish them later.
It makes no sense to spend energy finishing a piece that was poorly started. Invest your energies in stages A to D, and you will soon find that these stages become easier with practice.
In a future chapter, we will explore concepts of “values,” “edges,” and the “subdivisions of light and shadow areas,” which will help you better understand the finishing process.


